-
brands

Featured Brands
search for a brand name
TOP BRANDS IN ALPHABETICAL ORDERsee all brands
AAurora World Adajio Astral Altra Acorn Asheville Tea Company Alpineaire Andar Atlantic Coast Sports Accoutrements Albanese Amish Origins Airtype Studio All Terrain Ai Root Candle Atkinson Candy Adventure Medical Anastasia Ann Clark American Classic Tea Accusharp Andre Prost Arcade Belt Co Appalachian Trail Andrews Mcmeel A And M Leather Antigravity Gear Altiplano Arkansas Anchor Hocking Andree By Unit Appalachian Football Club American Licorice Co All Good Aquatabsmore ABBlundstone Birkenstock Burt's Bees Blue Ridge Apiaries Benchmade Buck N Bear Knives Bay Pointe Biscuit Head Badger Butternut Mtn.Farm Barley Bones Binghamton Knitting Be Atlas Buck Knives Brooks Sports Bogs Buff Boker Bum Wraps Black Diamond Bison Designs Baums Fried Pecans Big Agnes Brittle Brothers Bearvault Bubble Thing Bag Balm Bananagrams Blackberry Patch Born Bearington Collection Beantown Apparel Black Dog Boston International Buena Onda Games Blossom Blue Ridge Knives Be Creations And Des Boston America Bob Mandala Bestech Knives Borealis Press Big Sky Brands Bacon And Company Belmont Peanuts Biolite Be Creations And Designs Bubble Tree Bourbon Foods Basic Spirit Books And Maps Banana Boatmore BCClay In Motion Colonel Littleton Carhartt Carstens Colonel Conk Columbia Case Knives Cackalacky Calhoun Bend Mill Channel Craft Charles Chips Chaco Columbia River Knife Clic Cotopaxi C.C Collections Charms Co. Charles Viancin Collins Lane Art Creative Crafthouse Cobble Hill Puzzles Cooking Pleasures Counter Art Costa Del Mar Castillo Knives Coldpruf Cottage Door Press Chase Candy Country Homes Carolina Kettle Chips Crown Candy Crazy Aarons Compendium Charlie B Camelbak Civivi Chala Handbags Crazy Creek Ceaco Calloway Mills Chapel Hill Toffee Chums Ltd Columbia Sportswear Chattanooga Bakery Carson Optical Cjrb Colorforms Carve Designs Cablz Cold Steel Colosseum Chef ` N Chia Pets Chaby International Capri Designs Candy Dynamics Crocodile Creek Cold Storage Chuckit Cudas Chad's Chaimore CDDarn Tough Socks Davis Hill Dansko Duke Cannon Deweys Bakery Duck Head Dorfman Pacific Doug Osborne Dot's Pretzels Danner Duer Dovetail Workwear D ` Vine Foods Dorval Trading Co Design Imports Dr.Bronner's Douglas Cuddle Toy Duncan Toys Deuter Doschers Candy Deejo Darrell Lea Demdaco Delorme Mappingmore DEEno Exofficio Elope Ebba Elf On The Shelf Earth Sky + Water, Llc Eagle Creek Ecoxgear Escape Ecco E Cloth Ethyl Esee Eeboo Eagles Wingsmore EFFiesta Farm To Feet Fox River Fire Buggz Fits Sock Co. Fairway Ferrara Pan Candy Co Frontier Soups Free Fly Fjall Raven Fluff And Tuff Fred And Friends Fish Hippie Fenix Freestyle Fashion Plates Ford Gum Fontanini Flag And Anthem Fox 40 Folkmanis Filson Flexcutmore FGGci Outdoor Groove Life Gsi Outdoors Green Toys Gitzell Fairtrade Gerrit J Verburg Goetzes Gerber Gregory Grip6 Green Street Grand Trunk Grayl Guyot Designs Gooseberry Patch Go Girl Giftcraft Garden Works Grabber Warmers Gourmet International Gibbs Smith Goal Zero Ggb Candies Geocentral Gear Aidmore GHHelms Candy Co Hydro Flask Hey Dude Hoka One One Hammonds Candies Huk Helle Hershey Heritage Puzzle Heat Holders Hasbro Hultsbruk Hatley Helinox Hydrapak Hachette Hello Mello Lounge Wear Howler Brothers Hip Signs Hog Wild High Cotton House Of Marbles Helly Hansen Hungry And Howlin Habitat Heroclip Hot Tips Hf Publishingmore HJJameson Woodworks Jetboil Jelly Belly Candy Co Joy Susan Just Jump It Jerry Matthews Joules Joey Henson Art Jacobson Hat Co Just Born Jay Mac Sports Ja Rumore JKKuhl Keen Kershaw Knives Kraft Tyme Karesuando Kniven Klutz Kids Preferred Kelty Pack Kork Ease Kavu Klean Kanteen Kabar Kay Dee Keysmart Katadyn Kizer Cutlery Kurt Adler Kimmie Candy Kut Kuju Coffeemore KLLodge Lulu- B Legacy Hats Lowa L.L.Bean Lazy One Leatherman Lems Shoes Life Is Good La Mer Luxe Lintex Linens Loftus Lantern Press Laguiole Durand Land Of Dough Leki Lil Sucker L ` Artiste Little Brown Co Loksak Lansky Lifestraw License- 2- Play Llc Life Outside Sticker Comore LMMast General Store Merrell Mr Bird Mason Cash M.H.Bertucci Mountain Khakis Msr Mpowerd Memaws Mount Inspiration Mattel Michaelian Home Mountain House Mystery Ranch Molly And You Marmot Mast 1883 Muddy Pond Melissa And Doug Marsh Hen Mill Mice On Main Mountainsmith Matador Maple Landmark Marbles Manhattan Toy Moonpie Mcgowan Metal Earth Mimis Mountain Mixes Mountain Melodies Mountaineers Books Marich Murphys Naturals Macmillan Madd Capp Games Moonshine My Pet Enterprises Marttiini Master Pieces Puzzle Modgy Mayberry Bbq Sauce Myra Bag Mata Traders Mars Wrigley Molly Bracken Master Toys Millymook Dozer Mary Lake_thompson Monroe Hardware Mora Morinaga Mast Brand Muddy Bites Mederer Usa Mondelez Multipetmore MNNo Kidding Naylor Forge North River Nite Ize Nebo National Geographic Nalgene Nordic Company Inc Natural Life Now Designs Nature Cast Metalworks Nordic Ware Noso Patches Nexus Foods Incmore NOOboz On Running Old Mill Of Guilford Olukai Old Friend Slippers Old Mule Dipping Osprey Packs Olde Colony Bakery Oofos Oak Alley Farms Old Hickory Old Ranch Opinel Oliver Pluff And Company Oneill Old School Brand Outdoor Edge Ouray Olde Virden's Over Under Original Gourmet Outdoor Research Omega Screen Printsmore OPPatagonia Poppy Palmetto Farms Pbj Play Monster Primitive Woodsman Parris Manufacturing Perry's Enterprises Perfect Petzz Pikolinos P Graham Dunn Puffin Perky Pet Primrose Play Visions Pressman Toy Pearson Ranch Jerky Primitives By Kathy Prana Petzl Peter Pauper Press Pressbox Pop Rocks Professor Puzzle Pisgah Map Company Platypus Perfetti Van Melle Paricon Prandi Pocket Bellows Peking Handicraft Pez Candy Co Pacifica Packtowl Pendleton Pale Blue Earthmore PRRoyall Lyme Raven's Nest Rocket 9 Ruffwear Rosebud Rumpl Royal Robbins Richardson Rock Em Radio Flyer Rubik's Cube Red Carpet Studios Ruike Ruby Road Rough Rider Rab R.L.Scott Knives Romper Room Rm Palmer Rigwa Reflektmore RSSavannah Bee Salisbury Pewter Schylling Smartwool Socksmith Superfeet Spin Master Sog Snoozies Sconza Sperry Top- Sider Sunflower Food Co. Slinky Stanley Stuart Nye Jewelry Scout Curated Wears Swiss Army Spangler Candy Co Stonewall Kitchen Sienna Sky Swiftwick Spyderco Sorel Stroup Knives Sea To Summit Salomon Spirograph Sun Streamlight Sherpa Skybar Candy Schrade Sawyer Sawyer's Mill Stetson Southern Recipe Sp Enterprises Smarties Santoki Slip- N- Snip Southern Fried Cotton Simply Southern Spunky Pup Steel Will S.S.Adams Co. Sterling Sweetworks Sourcebooks Spin- Balls Soda Pup Sweet Candy Co Skye's The Limit Standard Candy Co Sunday Afternoons Stephan Baby Sabre Squirrel Nut Butter Sugarox Candy Studio Skeeter Hawk Sterling Ropemore STTilley Toysmith Troutman Chair Topo Athletic Tk Obriens True South Puzzle Co Two Old Goats Trophy Music The North Face The Printed Image Tervis The Artist Jay Two Bros Bows Therm- A- Rest The Landmark Project Tootsie Roll Tedco Think Fun Timex The Map Shop Tin Box Teva Tiki Toss Taylor Dry Goods The Duck Company Toor Knives Top Of The World Toad And Co Taylor Old Bond St. Tribal Sportswear Ty Inc True Utility The Original Toy Co Trish Brown Taos Footwear Taylor Environmental The Stickery Tortuga Imports Tru Fru Toobmore TWWinkler Knives Wind River Chimes Wounded Warrior World's Softest Willow Tree Wool Novelty Worlds Smallest Warthog Warmies Wind And Willow Wild Republic World Candies Waterford Press White River Knife And Tool Wet- It Woox Waboba Wildwood Productions World Import Company, Inc Wilfred Lee Booksmore W -
categories

Top Categories
CLOSE MENUMade In USA
Food Home & Hearth Personal Care Clothing & Accessories Candy Cast Iron Calendars, Cards, Journals, & Stickers Knives Outdoor Gear Pets Toys Sale & ClearanceWomen
Accessories Curvy Dresses Footwear Outerwear & Fleece Baselayers Leggings & Capris Pants Shirts & Tops Shorts Skirts & Skorts Sleepwear Sweaters & Midlayers Swimwear T-Shirts & Sweatshirts Travel Clothing Workwear Sale & ClearanceMen
Accessories Baselayers Footwear Outerwear & Fleece Pants Shirts Shorts Sleepwear Swimwear Sweaters & Midlayers T-Shirts & Sweatshirts Travel Clothing Workwear Sale & ClearanceGift Ideas
Her Him Kids Gift Boxes Gift Cards Jewelry Pets & Animal Lovers Secret Santa Stocking Stuffers Them Sale & ClearanceCandy
International Fruity & Fun Vegan Novelty Gum Mints Candy Bars Candy Gifts Caramels, Nougats, & Taffy Chocolate Gummies Hard Candy & Lollipops Hot Candy Jelly Beans Licorice Mast Candy Collection Nuts & Coconut Old Fashioned Favorites Sour Candy Holiday Candy Sale & ClearanceMast Collection
Candy Clothing & Accessories Food Mugs & Tumblers Ornaments Pottery Reusuable Totes Whatnots Sale & ClearanceHome & Hearth
Garden & Outdoor Living Home Decor Kitchen Cleaning Furniture Music Pottery Reusable Totes Sale & Clearance -
stores

Original - Valle Crucis close menu
visithours
mon9AM - 6PM
tue9AM - 6PM
wed9AM - 6PM
thu9AM - 6PM
fri9AM - 6PM
sat9AM - 6PM
sun11AM - 6PM
Annex - Valle Crucis close menu
visithours
mon10AM - 6PM
tue10AM - 6PM
wed10AM - 6PM
thu10AM - 6PM
fri10AM - 6PM
sat10AM - 6PM
sun11AM - 6PM
Asheville close menu
visithours
mon10AM - 8PM
tue10AM - 8PM
wed10AM - 8PM
thu10AM - 8PM
fri10AM - 9PM
sat10AM - 9PM
sun11AM - 6PM
Boone close menu
visithours
mon10AM - 6PM
tue10AM - 6PM
wed10AM - 6PM
thu10AM - 6PM
fri10AM - 7PM
sat10AM - 7PM
sun11AM - 6PM
Columbia close menu
visithours
mon10AM - 6PM
tue10AM - 6PM
wed10AM - 6PM
thu10AM - 6PM
fri10AM - 8PM
sat9AM - 8PM
sun11AM - 6PM
Greenville close menu
visithours
mon10AM - 8PM
tue10AM - 8PM
wed10AM - 8PM
thu10AM - 8PM
fri10AM - 9PM
sat10AM - 9PM
sun11AM - 6PM
Hendersonville close menu
visithours
mon10AM - 6PM
tue10AM - 6PM
wed10AM - 6PM
thu10AM - 6PM
fri10AM - 7PM
sat10AM - 7PM
sun11AM - 6PM
Knoxville close menu
visithours
mon10AM - 8PM
tue10AM - 8PM
wed10AM - 8PM
thu10AM - 8PM
fri10AM - 9PM
sat10AM - 9PM
sun11AM - 6PM
Roanoke close menu
visithours
mon10AM - 6PM
tue10AM - 6PM
wed10AM - 6PM
thu10AM - 6PM
fri10AM - 8PM
sat10AM - 8PM
sun11AM - 6PM
Waynesville close menu
visithours
mon10AM - 6PM
tue10AM - 6PM
wed10AM - 6PM
thu10AM - 6PM
fri10AM - 7PM
sat10AM - 7PM
sun11AM - 6PM
Winston-Salem close menu
visithours
mon10AM - 6PM
tue10AM - 6PM
wed10AM - 6PM
thu10AM - 6PM
fri10AM - 8PM
sat10AM - 8PM
sun11AM - 6PM
-
in-store pickup

Original - Valle Crucis close menu
selecthours
mon9AM - 6PM
tue9AM - 6PM
wed9AM - 6PM
thu9AM - 6PM
fri9AM - 6PM
sat9AM - 6PM
sun11AM - 6PM
Annex - Valle Crucis close menu
selecthours
mon10AM - 6PM
tue10AM - 6PM
wed10AM - 6PM
thu10AM - 6PM
fri10AM - 6PM
sat10AM - 6PM
sun11AM - 6PM
Asheville close menu
selecthours
mon10AM - 8PM
tue10AM - 8PM
wed10AM - 8PM
thu10AM - 8PM
fri10AM - 9PM
sat10AM - 9PM
sun11AM - 6PM
Boone close menu
selecthours
mon10AM - 6PM
tue10AM - 6PM
wed10AM - 6PM
thu10AM - 6PM
fri10AM - 7PM
sat10AM - 7PM
sun11AM - 6PM
Columbia close menu
selecthours
mon10AM - 6PM
tue10AM - 6PM
wed10AM - 6PM
thu10AM - 6PM
fri10AM - 8PM
sat9AM - 8PM
sun11AM - 6PM
Greenville close menu
selecthours
mon10AM - 8PM
tue10AM - 8PM
wed10AM - 8PM
thu10AM - 8PM
fri10AM - 9PM
sat10AM - 9PM
sun11AM - 6PM
Hendersonville close menu
selecthours
mon10AM - 6PM
tue10AM - 6PM
wed10AM - 6PM
thu10AM - 6PM
fri10AM - 7PM
sat10AM - 7PM
sun11AM - 6PM
Knoxville close menu
selecthours
mon10AM - 8PM
tue10AM - 8PM
wed10AM - 8PM
thu10AM - 8PM
fri10AM - 9PM
sat10AM - 9PM
sun11AM - 6PM
Roanoke close menu
selecthours
mon10AM - 6PM
tue10AM - 6PM
wed10AM - 6PM
thu10AM - 6PM
fri10AM - 8PM
sat10AM - 8PM
sun11AM - 6PM
Waynesville close menu
selecthours
mon10AM - 6PM
tue10AM - 6PM
wed10AM - 6PM
thu10AM - 6PM
fri10AM - 7PM
sat10AM - 7PM
sun11AM - 6PM
Winston-Salem close menu
selecthours
mon10AM - 6PM
tue10AM - 6PM
wed10AM - 6PM
thu10AM - 6PM
fri10AM - 8PM
sat10AM - 8PM
sun11AM - 6PM
-
blog

latest blog posts see all blog posts CLOSE MENU
-
January 17, 2025 14 minute READ
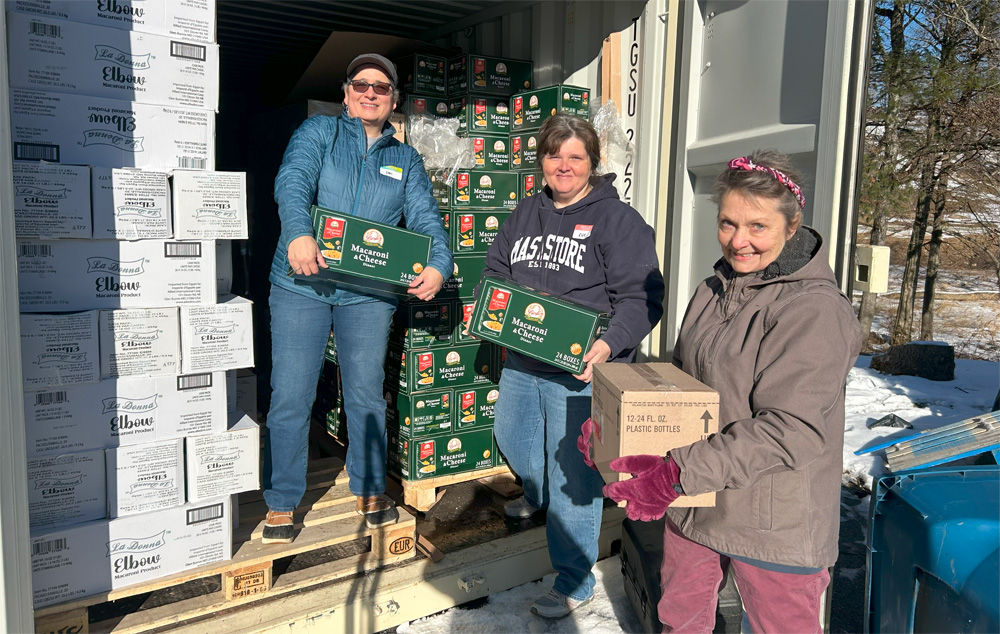
More Than Just a Day Off 2025
Martin Luther King, Jr. is the first modern private citizen to be honored with a federal holiday. It was a long struggle to set aside the third Monday in January as a day to honor and celebrate a man who advocated for not only racial equality but also economic equality and for all people to be treated with respect and dignity. While the legislation to set aside the day was signed by Ronald Reagan in 1983, its first official celebration was on January 18, 1986, and it took until 2000 for all 50 states to recognize it as a state government holiday. ...read more
 Behind the Scenes | Inspiration | Local Flavor | Mast Family Favorites
 All
All
-
January 8, 2025 10 minute READ

A Winter Warm Up is on the Way
According to the National Centers for Environmental Information, areas in the Eastern United States reach their seasonal minimum temperatures in mid-January. It makes sense, then, to have International Hot and Spicy Food Day on January 16 for a little winter warm-up. ...read more
 Adventure | Mast Family Favorites
 All
All
-
January 2, 2025 6 minute READ

A Mast-Exclusive Knife That's No Tall Tale
When the founders of GiantMouse, a premium knife company, first began putting their heads together to conjure a vision for their future brand, it was fitting that their regular meeting destination was in a literature-themed bar in Brooklyn, New York, called BIBLIO. ...read more
 Behind the Scenes | Inspiration
 All
All
Favorite blog posts CLOSE MENU
-
November 30, 2023 10 minute READ

It Just Would Not Be the Holidays Without
... Our favorite foods! Food is universal because everybody’s got ta eat! And the last two months of the year are filled with more than their fair share of family meals, work gatherings, special outings to favorite restaurants, tins filled with homemade cookies and fudge, and the anticipation of food traditions handed down from generation to generation ...read more
 At Home | Recipes
 All
All
-
May 26, 2023 7 minute READ
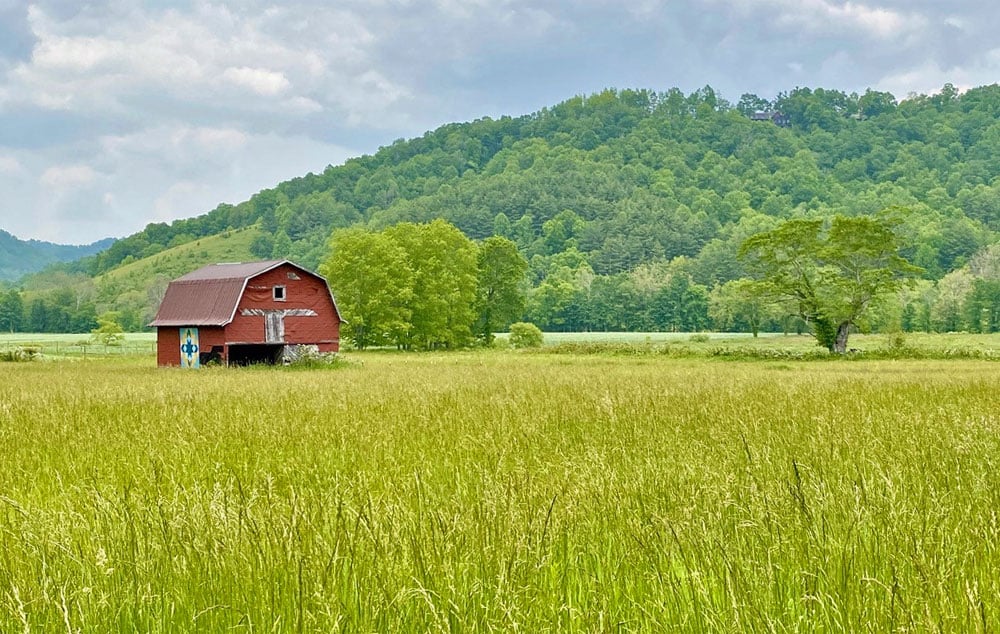
John and Faye Cooper: Why We Support Land Trusts
Even before we bought the Mast General Store, we were taken by the beauty of Valle Crucis. We’ve heard people describe the drive out Broadstone Road as traveling through a time portal. In the 1970s, fields in the river bottoms would be filled with tobacco, cabbage, or high with hay to feed cattle that were grazing in the summer pasture. ...read more
 Local Flavor | Mast Family Favorites
 All
All
-
April 20, 2023 5 minute READ

Mark Earth Day with a Plan for Action
The lucky few who have seen the Earth from a different perspective – astronauts - all echo the same viewpoint upon their return. Yuri Gagarin, a Russian cosmonaut and the first human to go to space, commented, “Orbiting Earth in the spaceship, I saw how beautiful our planet is. People, let us preserve and increase this beauty, not destroy it.”
 Behind the Scenes | Inspiration
 All
All
CLOSE MENU
all Original - Valle Crucis Annex - Valle Crucis Asheville Boone Columbia Greenville Hendersonville Knoxville Roanoke Waynesville Winston-Salem location
 -


 Sign In
 Go to My Account
 Password Reset
 Email Preferences
 Order History
 Address Book
 Mailing List
 Wish List
 Sign Out


 828-963-6511
 directions
 Parking


 history
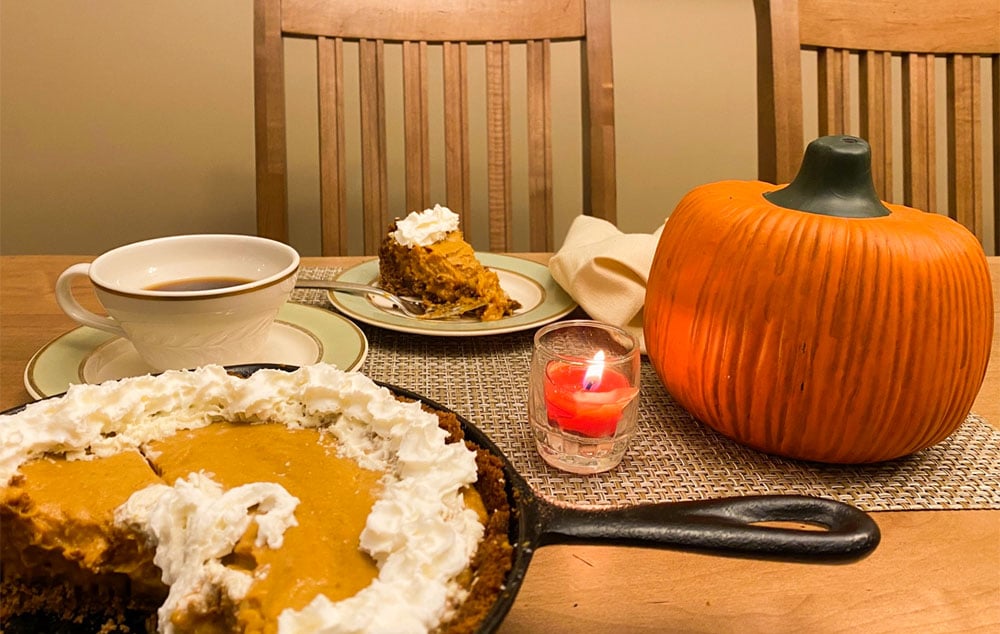
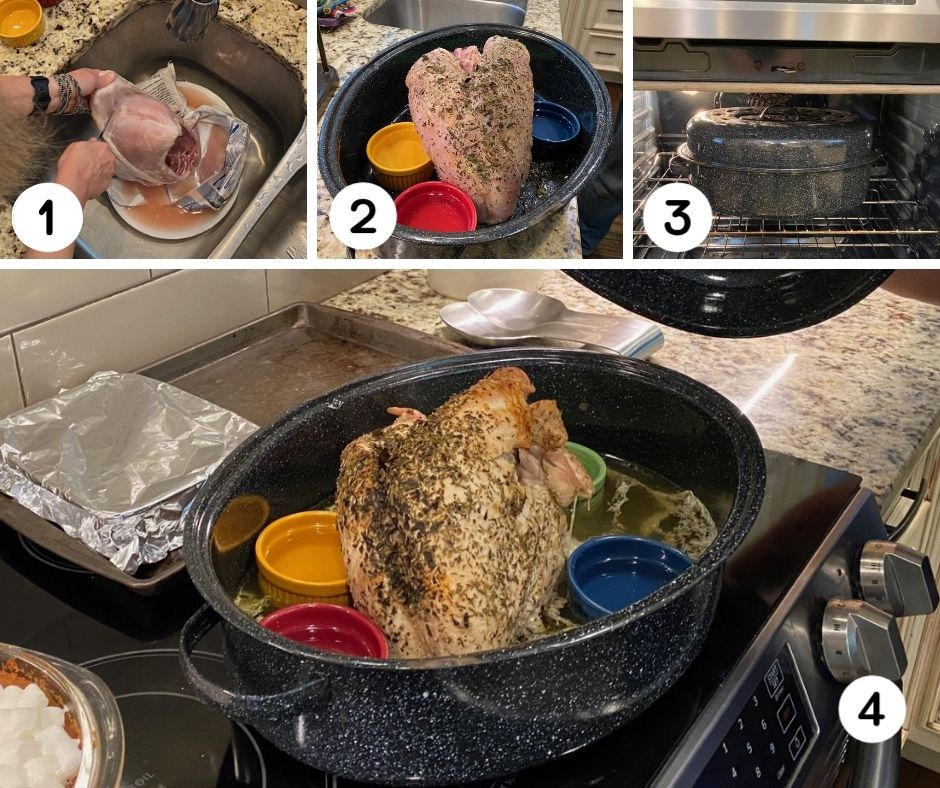 1 turkey breast
 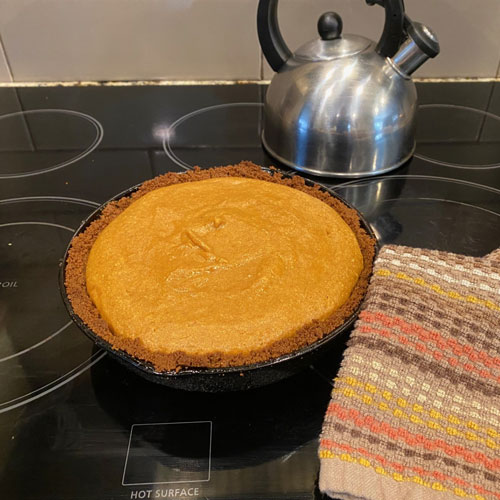 1 ¾ to 2 cups fine gingersnap crumbs (about 40-50 small cookies)